Reading the Output
This guide explains how to read CVE Lite CLI output and turn it into next actions.
Default (compact) output
Running cve-lite . without flags gives you a focused view: the top urgent findings, copy-and-run fix commands, and a summary.
What to read first:
- The Vulnerabilities found block — top critical/high packages with one-line fix guidance each. Findings with high EPSS exploitation likelihood (top 10%) are flagged inline with a
`⚡ Fix Now`priority signal badge. - The Copy And Run These Fix Commands block — grouped, package-manager-native commands ready to execute
- The Summary — total count broken down by severity and direct vs transitive
When to use --all:
Add --all to append a full findings table covering every severity level, including low and unknown.
cve-lite . --all
Verbose output
Add --verbose for the full picture: severity counts, full fix command tables, complete findings table, and coverage notes.
cve-lite . --verbose --all
The screenshots below use a real OWASP Juice Shop scan.
1) Start with the summary
The top of verbose output tells you how much risk you are dealing with and where it sits.
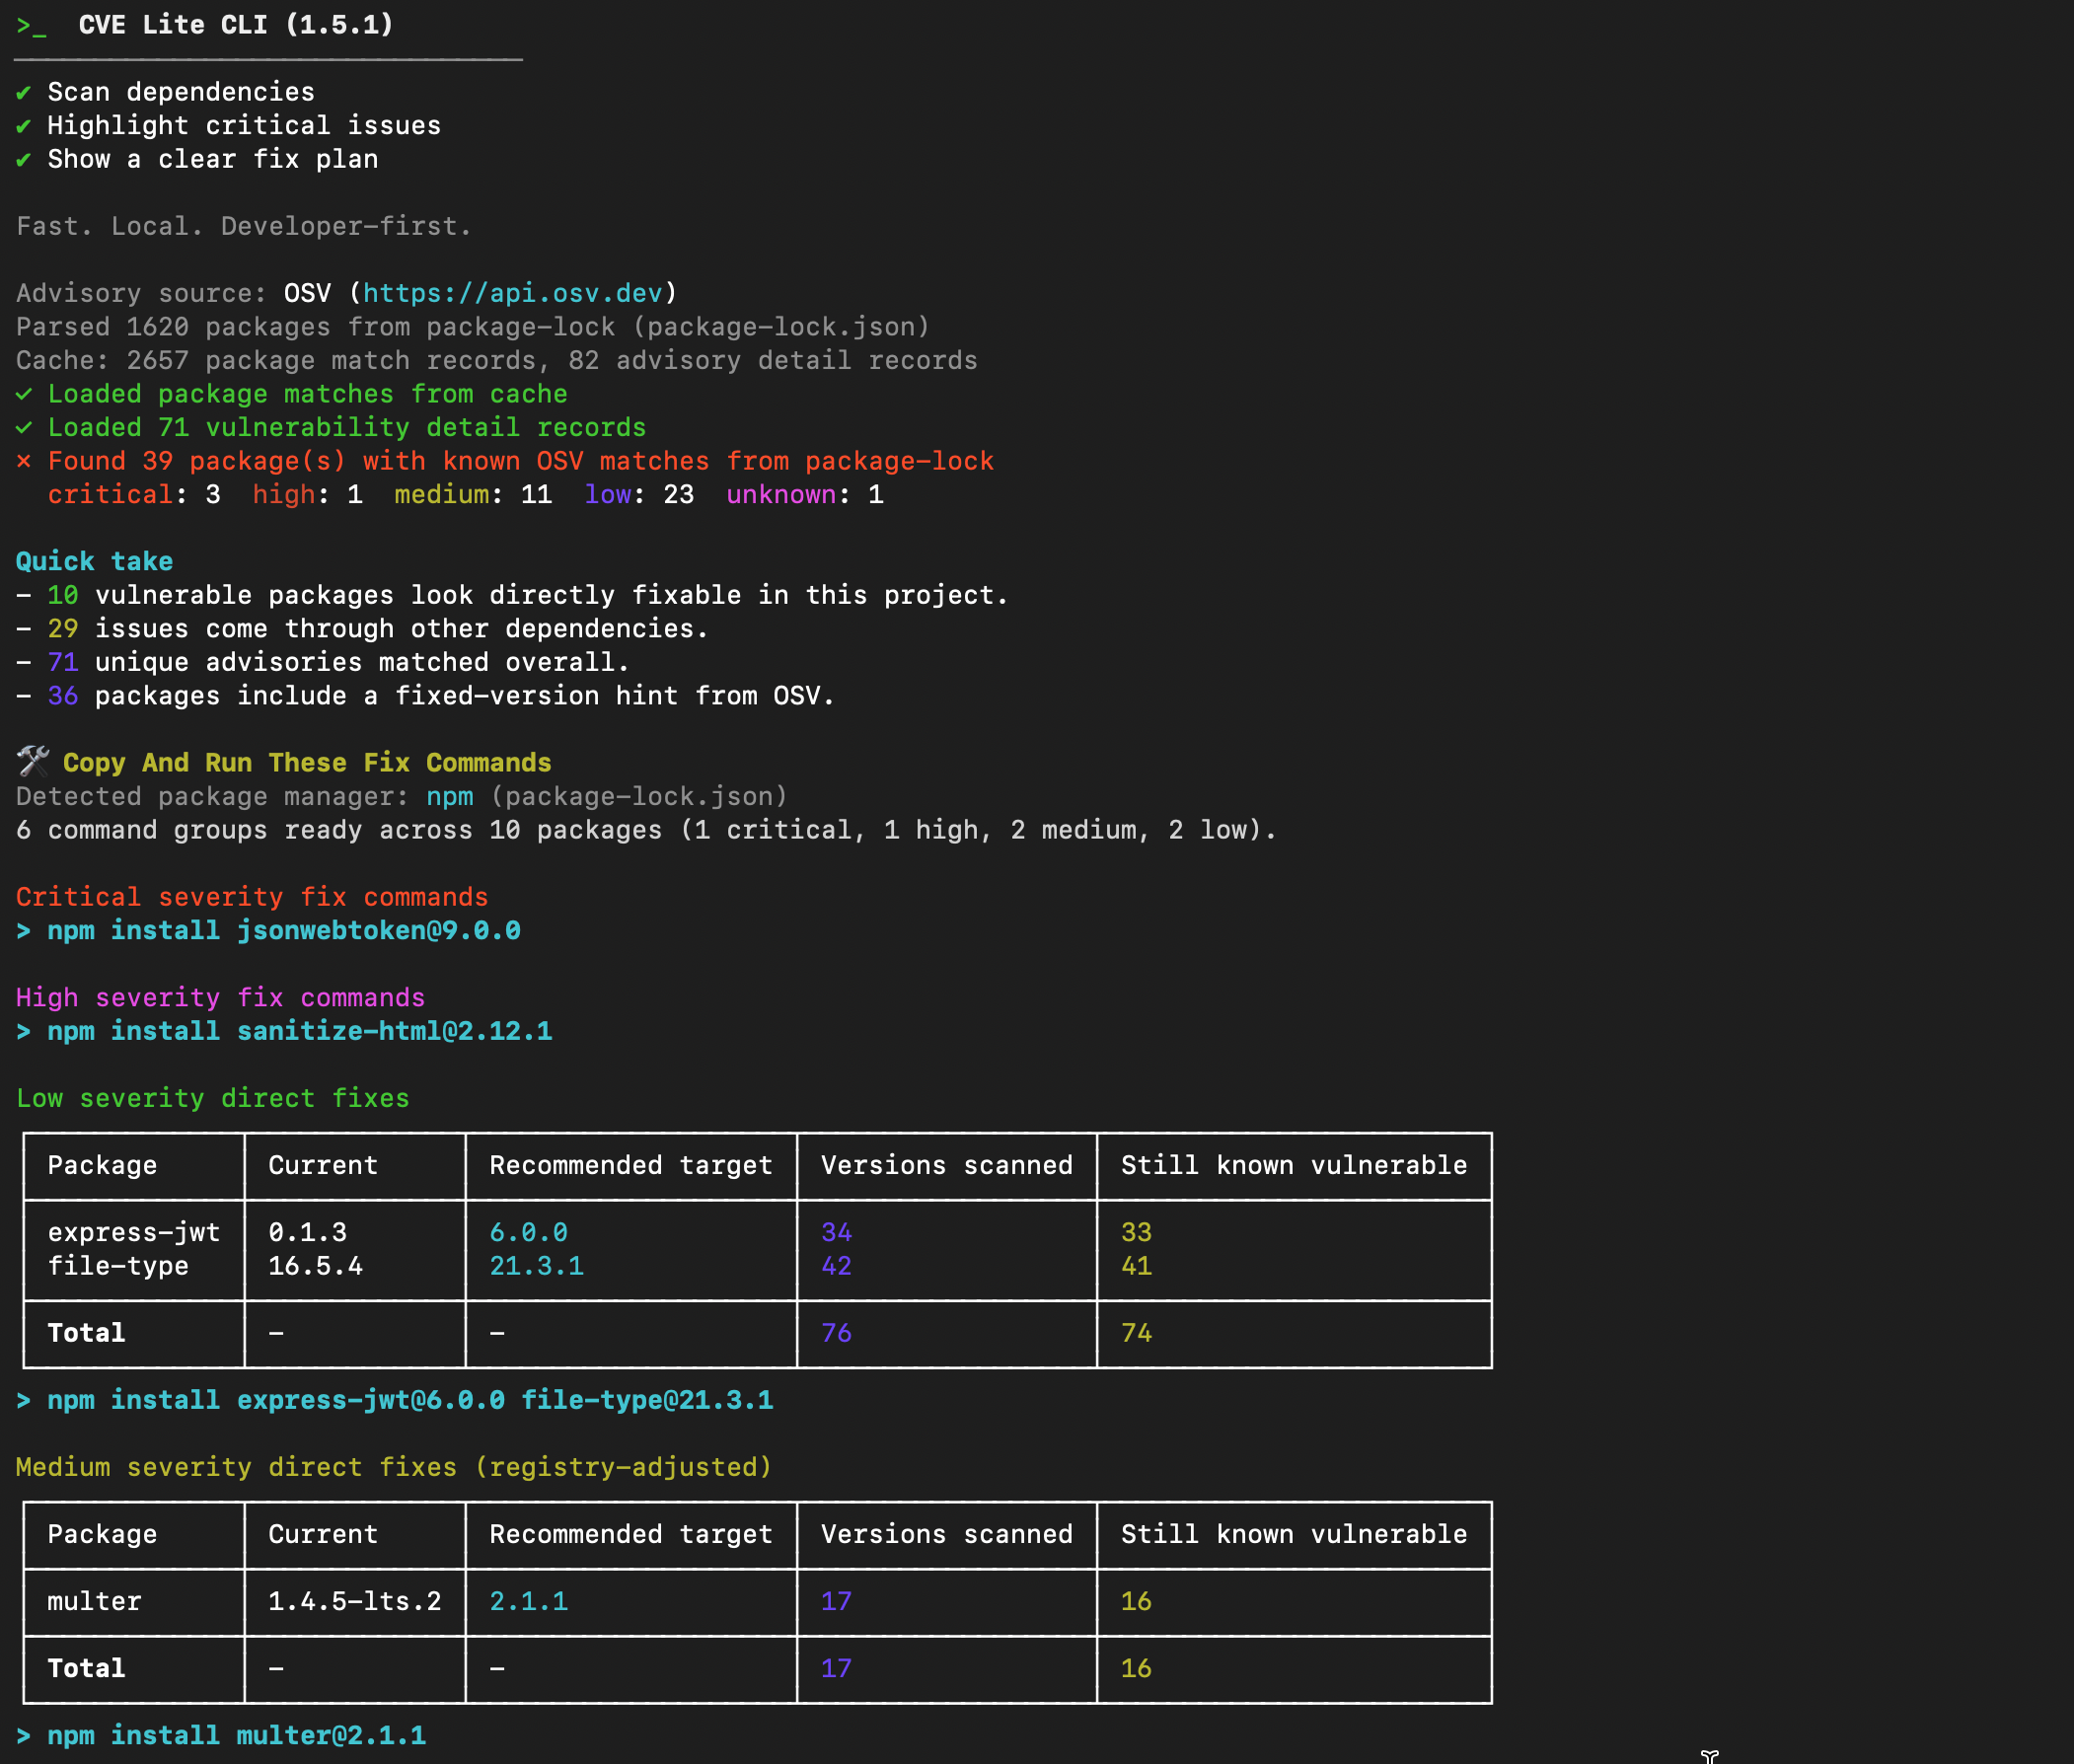
What to read first:
- the severity counts (
Critical,High,Medium,Low,Unknowncounts) - direct vs transitive split in
Quick take - unique advisories count
What to do next:
- if
CriticalorHighis non-zero, move straight toCopy And Run These Fix Commands
2) Use command groups for first-pass fixes
Verbose mode groups runnable commands by severity and fix type.
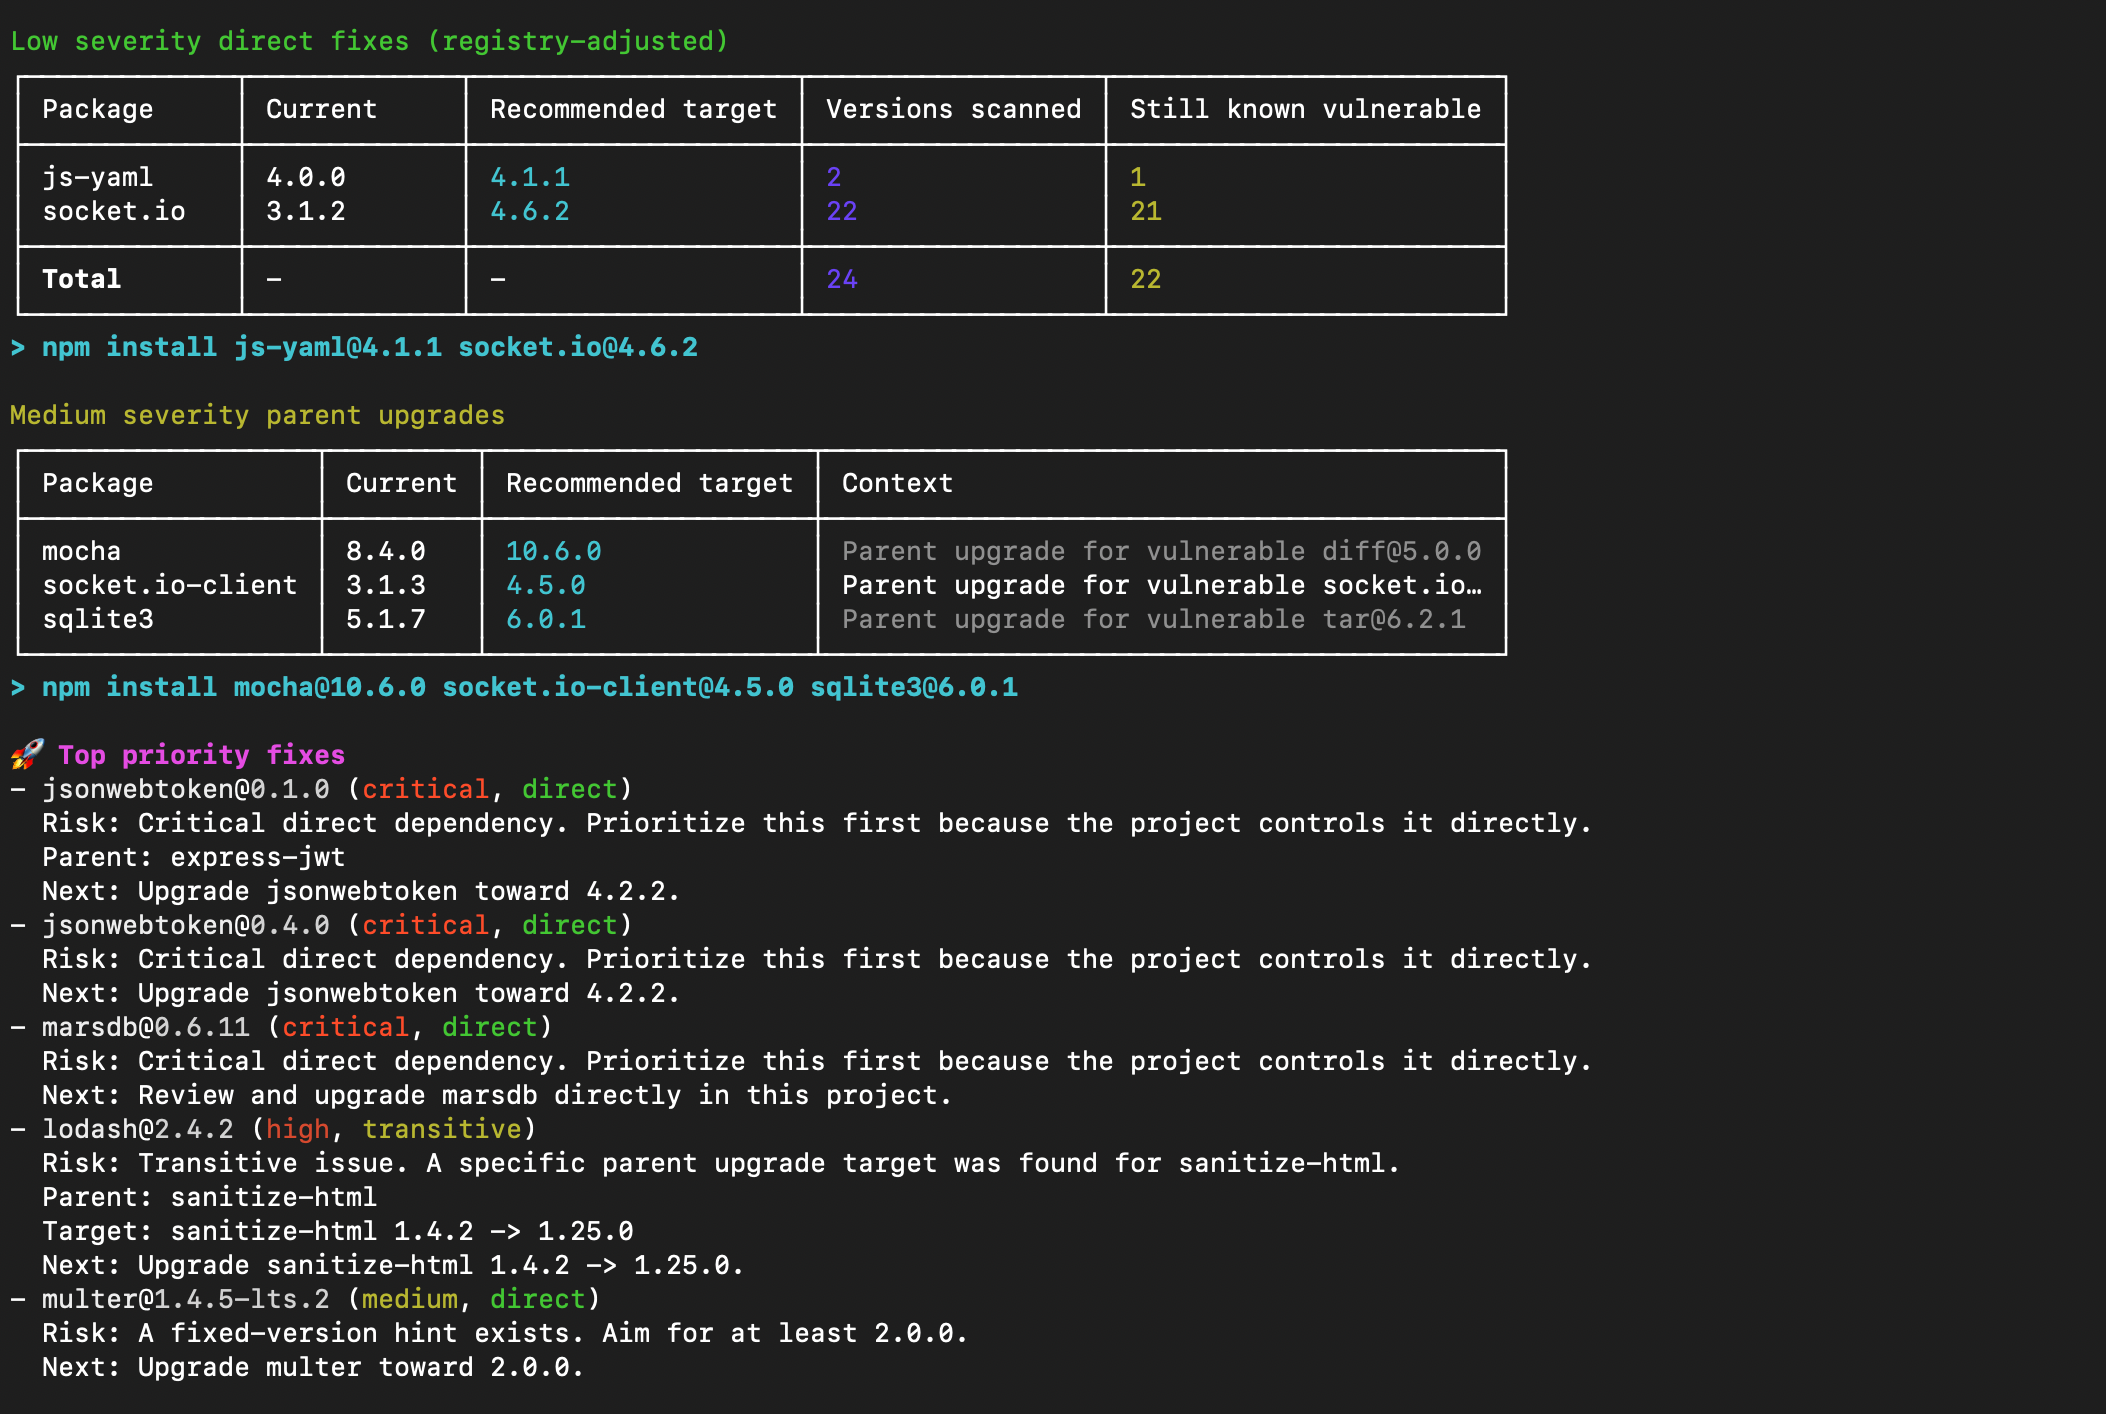
How to use this section:
- run critical/high command groups first
- run direct fix groups next
- rescan after each command group
- check
Breaking?(⚠) on any target — a flagged version is a major bump and may introduce breaking changes
Why this helps:
- you avoid manual package-by-package trial and error
- you get package-manager-native commands ready to copy and run
3) Use the findings table for risk inventory
The main findings table is your full inventory of affected packages, severity, relationship type, fixed-version hints, EPSS threat percentiles, EPSS priority classification, and advisory IDs.
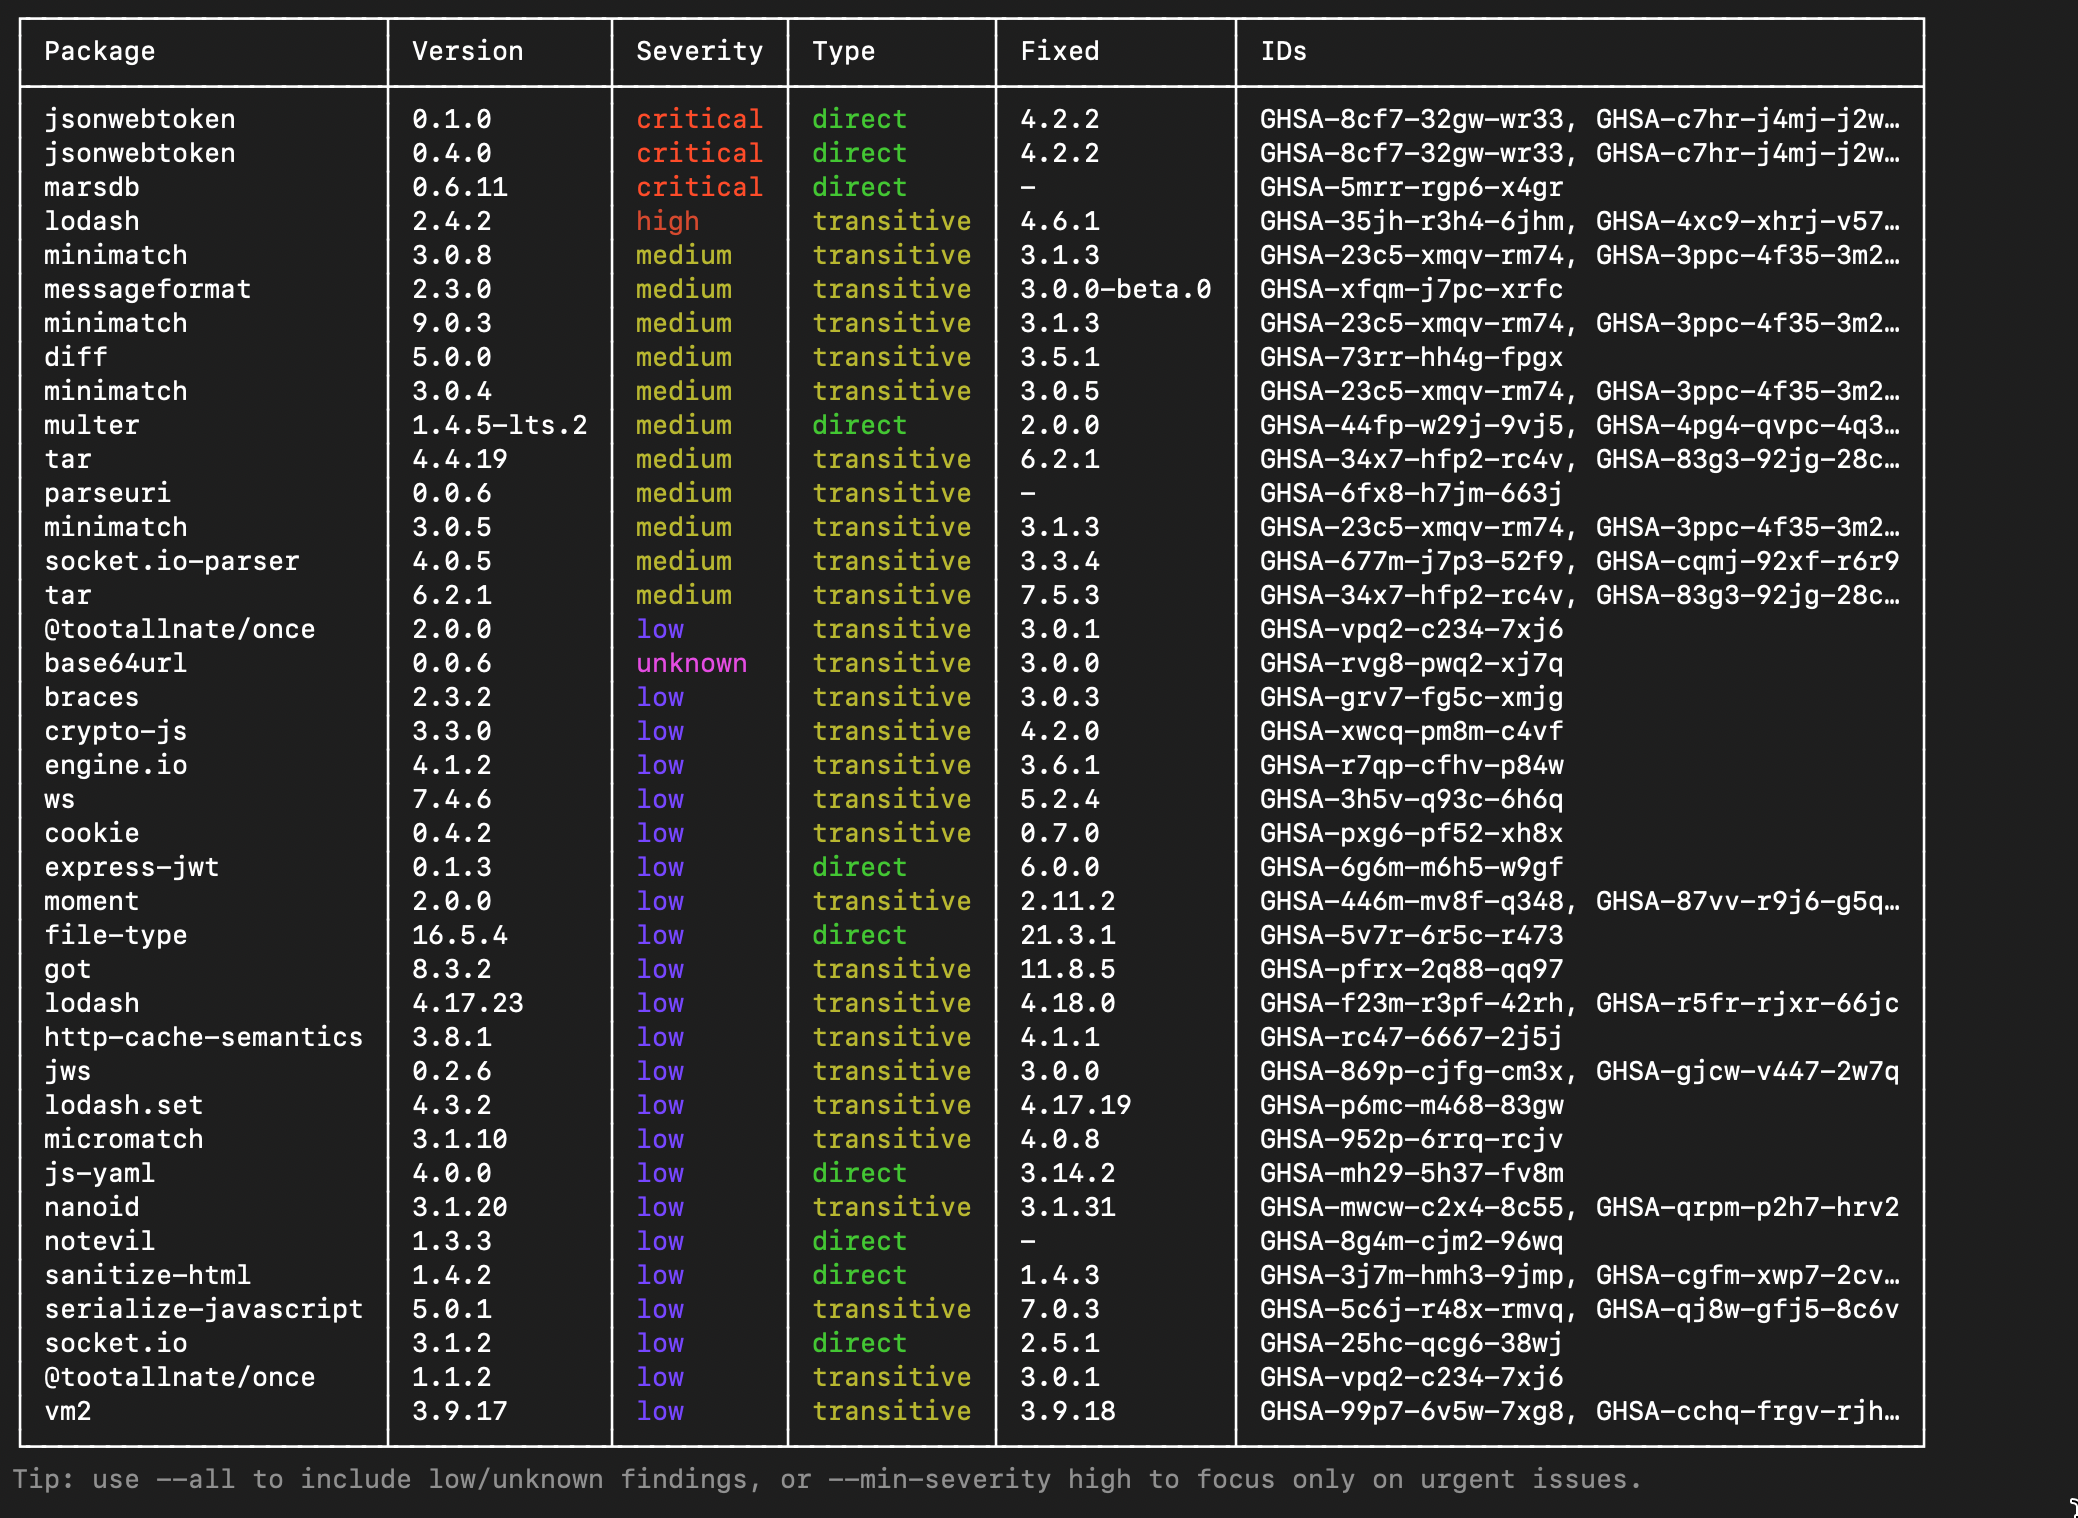
How to use this section:
- read
PackageandVersionto understand what you control - use
Usageto quickly identify if the dependency is actually imported or just noise (requires--usageflag) - review
EPSS(raw percentile) andEPSS Priorityto triage findings by real-world exploitation likelihood:Fix Now: Critical or high severity + top 10% EPSS exploitation likelihood — address immediatelyFix Soon: Critical or high severity, but EPSS not in top 10% — schedule remediationMonitor: Medium or lower severity + top 10% EPSS exploitation likelihood — watch closelyLow Priority: Medium or lower severity, but EPSS not in top 10% — handle in routine maintenance cycles
- use
Fixedto see what the safe target version is
Prioritization signals (heuristic)
Verbose output, compact finding details, and JSON include optional contextual prioritization signals. These are triage hints, not exploitability or runtime-reachability verdicts. They are separate from prioritySignal (severity + EPSS).
| Signal | When present | Values | What it is not |
|---|---|---|---|
usage | Only with --usage / --only-used | imported, not_imported | not_imported is not proof the package is unused at runtime or safe |
reachabilityHint | From lockfile path depth and import-scan heuristic | direct_dependency, path_depth_N, transitive_imported, unknown | Not a runtime reachability proof. Prefer path depth over restating the findings-table relationship. Omitted when transitive depth is unknown. transitive_imported means the vulnerable package appeared in the import/require scan, not that a lockfile root is imported |
exposure | Package names on dependency paths | request_facing_path, not_indicated | Name-based markers only (for example express). not_indicated does not mean the package is not exposed |
In JSON each finding has a contextualSignals object. Each signal is { value, basis, heuristic: true } or null when it cannot be computed (usage is null unless you passed --usage). Terminal lines omit signals with no data (so you will not see usage=n/a on a default scan).
4) Review coverage notes
Coverage notes appear below the findings table. They describe what the scan covered and what it did not — useful for understanding gaps before sharing results with a team.
10-minute workflow
- Run
cve-lite . --verbose --all. - Address
Fix Nowfindings and critical/high command groups first. - Apply direct fix groups with validated targets.
- Apply parent-upgrade command groups for transitive paths.
- Rescan and repeat until urgent findings are reduced.
This approach keeps remediation practical: start with executable commands, then handle deeper dependency decisions with the table as reference.